Hosting Ghost on Microsoft Azure
One of my first personal projects was the Cloud Resume Challenge, which consists of building your resume's static website with Azure services. This rewarding project allowed me to explore new Azure services and enhance my GitHub and CI/CD skills. I wanted to build on this project so I decided to dive in and learn how to host a blog. While the WordPress Azure App Service is a common choice, I opted to use Ghost to explore a different platform and to get more in-depth experience with other Azure services. In this article, we'll go over setting up our Azure resources, creating a custom domain, building a container with Docker and tying it all together.
What is Ghost?
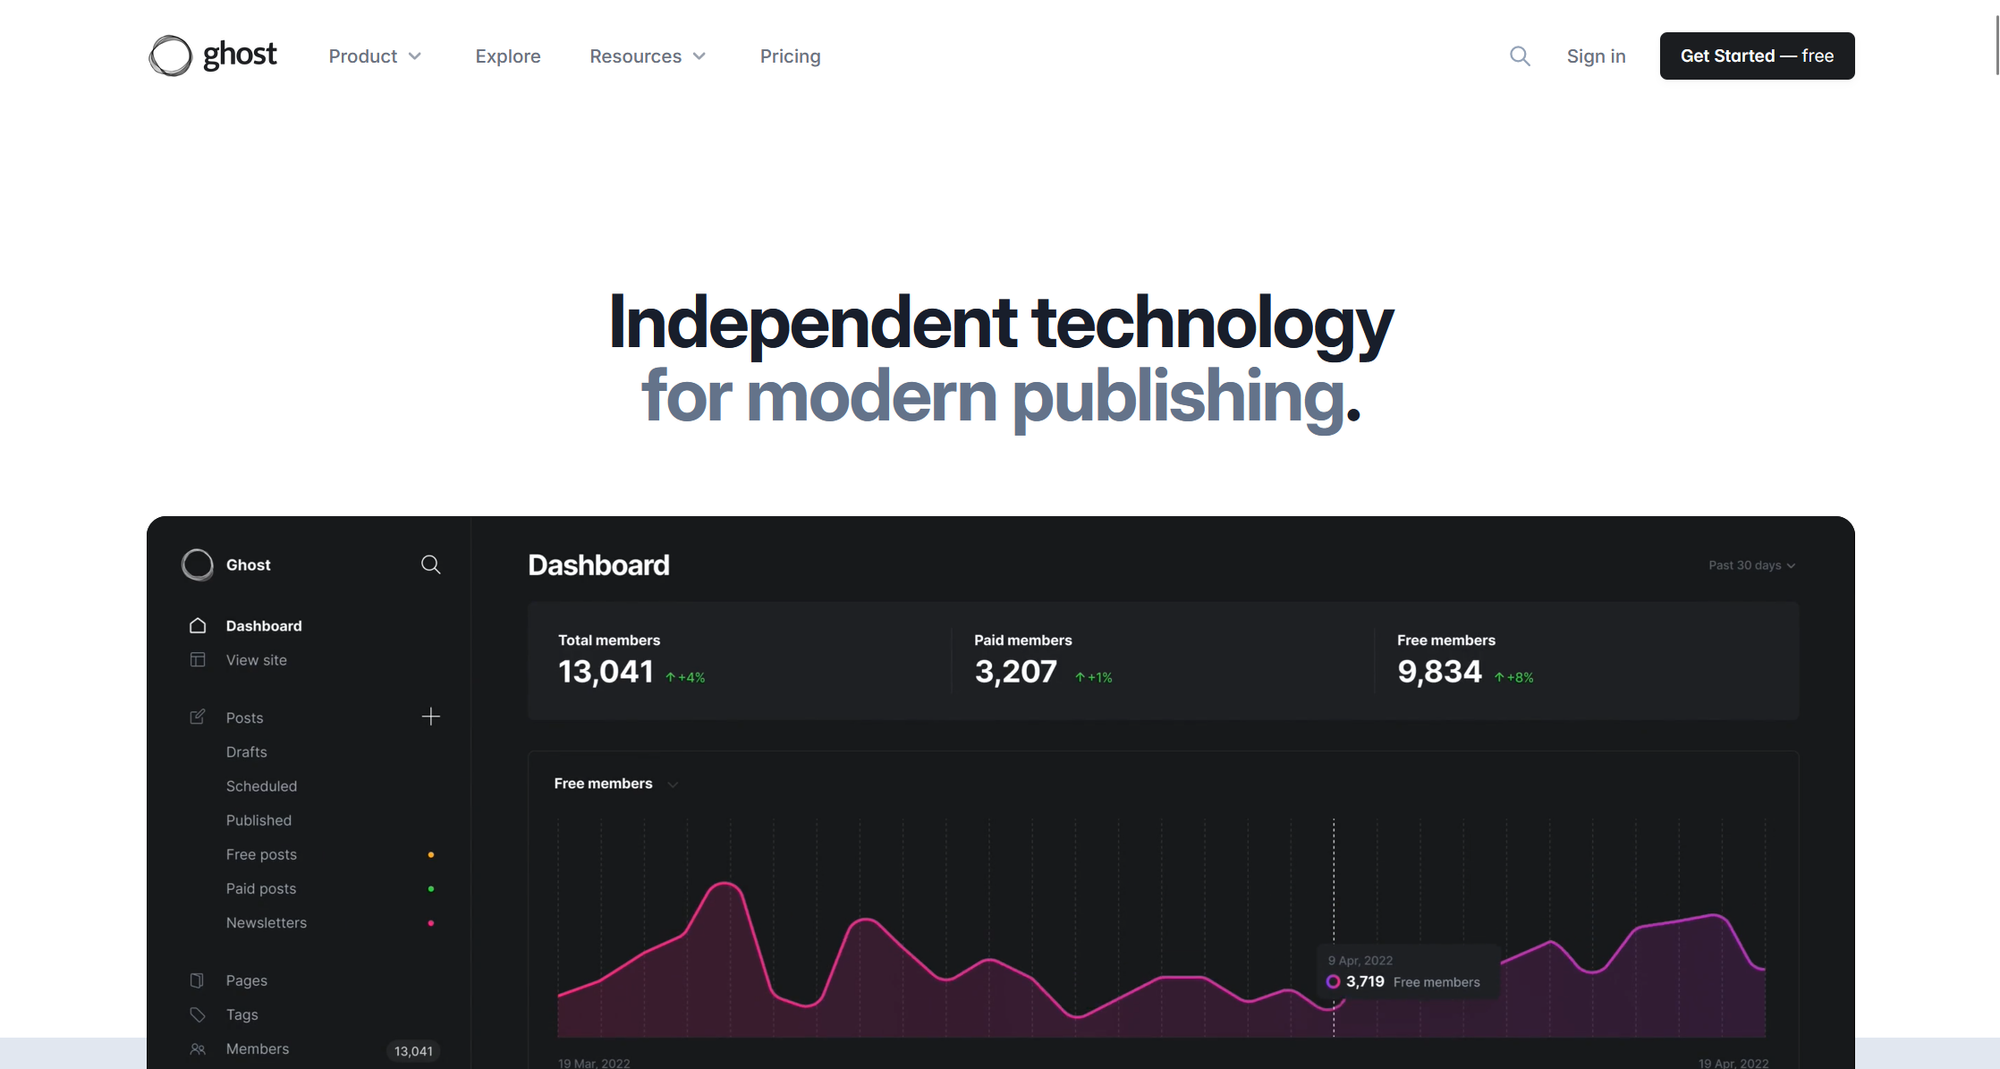
Ghost is a free open-source content management service used for creating and publishing blogs built on the Node.js platform. Ghost offers easy-to-use tools for content creation, growing your audience, analytics, and monetizing your content. Ghost has two different offerings: a monthly subscription to their service called Ghost(Pro) or a self-hosted option. With the self-hosted option, you can install the service locally using Ghost CLI (Windows, macOS, Linux), install it on a Ubuntu server, or build an image using a Docker container. I opted to use the latter. First, let's go over all the resources needed to self-host Ghost.
Requirements
There are a few main resources required to self-host Ghost. I've tried to make hosting this blog as inexpensive as possible.
- Domain name: Cloudflare or Namecheap
- Storage: Azure Storage
- Database: Azure MySQL Flexible Server
- Container: Azure Web App for Linux
- Container registry: Docker Hub (or Azure Container Registry)
Registering a Domain Name
Many different services offer domains at relatively cheap prices. The most popular ones are Namecheap and Cloudflare. I decided to go with Cloudflare because at the time of building this blog, they were offering a great deal for $11 per year. Cloudflare's free plan gives you access to their Content Delivery Network (CDN), an SSL certificate to use on your website, distributed denial-of-service (DDoS) and much more. Namecheap also offers similar services in their free plan but their SSL certificate is only free for one year, so you will need to subscribe to a yearly plan to use it. Setting things up on Cloudflare was relatively easy and they provide many video tutorials on how to use their services. You can also use the Azure Content Delivery Network but you will be billed be per GB sent. We'll loop back to our domain registrar once we create our required Azure resources.
Creating your Azure Resources
Next up, we'll begin creating our storage, database, and app container resources within Azure. Just remember that to create resources in Azure, you will need to assign them to a resource group. The best practice is to create a new group that only contains resources related to a specific solution. How you decide to go about creating the resources is all up to you, using the Azure Portal, Azure CLI or an infrastructure-as-code (IaC) tool like Terraform. I prefer to run things locally, so I used the Azure CLI add-on within PowerShell to build everything but there are some steps where I utilized the Azure Portal.
Our first step is to authenticate with your Azure tenant using the "az login" command and select your subscription. Once authenticated, you now build your resource group with the following command:
az group create --name "YourGhostBlogNameHere-RG" --location eastus2I provisioned all my resources in the East US 2 region, so the SKUs and pricing may vary depending on where they are created.
Azure Database for MySQL Flexible Server
SKU and pricing - Burstable tier (B1ms), $12.41/month
Ghost currently only supports MySQL 8 in production. Using the Azure CLI, we use the "az mysql" command to create a MySQL 8 flexible server. We will need to define the region (location), the resource group, and the name of the MySQL server, our SKU/tier, database name (ghostdb), and allow public access to the server from any service within Azure.
az mysql flexible-server create --resource-group "YourGhostBlogNameHere-RG" --location eastus2 --name "YourGhostBlogMySQLServer" --version 8.0.21 --sku-name Standard_B1ms --tier Burstable --database-name "ghostdb" --public-access 0.0.0.0This command will take a few minutes to build your server. When it's completed, you should see an output that lists the attributes of your newly created MySQL server. Please make note of the admin username and password as you'll need to refer to them when you're building your Ghost Docker image.
Azure Storage Account
SKU and pricing - General Purpose (StorageV2), Hot tier, $0.02/GB for the first 50TB
Typically, Ghost stores media files locally but you can use a custom module called ghost-azurestorage that will allow you to utilize Azure Storage, but more setting that up later. With the Azure CLI, we will use the "az storage account" command to create a storage account and the "az storage container" command to create a blob container. When fully configured, Ghost will use that container to store your images and other data. First, create the storage account with the following command to place it in the correct resource group, define the storage account name, set the SKU, set the access tier, and set up public access for your blog images:
az storage account create --name "yourghoststorageaccount" --resource-group "YourGhostBlogNameHere-RG" --location eastus2 --sku Standard_LRS --access-tier Hot --allow-blob-public-access true --min-tls-version TLS1_2 --public-network-access EnabledThen we will create a blob container within that account and allow the data to be read anonymously:
az storage container create --account-name "yourghoststorageaccount" --name "ghost" --public-access blobAfter running this, you should get an output of "true", indicating that the storage account was set up successfully.
Azure App Service for Linux
SKU and pricing - Basic App Service Plan (B1), $12.41/month
Azure App Service is a platform-as-a-service (PaaS) that allows you to build, deploy, and scale your web apps to the cloud. Azure App Service supports various languages such as .NET, Python, Node.js (which Ghost is built on), and much more within Linux and Windows environments. All web apps built in Azure must have an app service plan associated with it. Azure offers a free plan but this is only suitable for testing purposes, so we will need to use a Basic plan (B1) to run Ghost. The B1 service plan will grant us access to 1 CPU core, 1.75GB, and 10GB of storage, which is more than enough to run Ghost. Use the following command to create your app service plan:
az appservice plan create --name "YourGhostBlog-ASP" --resource-group "YourGhostBlogNameHere-RG" --location eastus2 --is-linux --sku B1Once, executed this command should only take a minute or so to create. However, you may run into an error stating that there are not enough instances to execute this. You can either wait a bit for Azure to free up instances or build your App Service Plan in another region. Once the App Service Plan is provisioned, we can move on to building our Docker image for Ghost, and then deploy the image to the Azure App Service.
Building your Ghost Docker Image
Installing Docker Desktop
Docker is an open PaaS service for developing, deploying, and running applications in a separate environment called containers. Containers are small and have all the essentials to run your app without depending on what's installed on the host machine. A Docker Personal account will grant you access to everything you will need to build and deploy your Ghost blog.
Install Docker Desktop and register for a free account. Once you've installed the desktop app and registered. You will now have access to the Docker Engine, Docker Hub and Docker Scout. The Desktop is a GUI-based app that runs the Docker Engine, which is where you will build and manage your app containers and images. Images are sort of like read-only blueprints to build your app container. When you successfully build your image, you can store your image in the Hub, where you can store, share and deploy your image to a container host of your choice. Docker Scout is a tool used to analyze your images and identify any vulnerabilities they may have.
Now that we have Docker Desktop installed and running, we can start to build our Ghost image. First, create a new folder on your PC to build a local repository for your Ghost image.
Adding a theme to your Ghost blog
Ghost supports many different themes and most are available on GitHub and also includes a live sample so you can test the features of your desired theme. Decide on a theme, then launch your favorite code editor. Open your local repository in your code editor and run the following command:
git clone https://github.com/TryGhost/Massively content/themes/MassivelyConfiguring your Ghost blog
Next, let's configure Ghost to connect to our Azure resources. When self-hosting Ghost, you'll need to use custom JSON configuration files. Ghost official documentation states that within your config file, you must define values for "url", "database" and "mail" in production, but "mail" can be set up at a later date. Additionally, we'll also need to define "storage" and make use of the ghost-azurestorage module we discussed earlier Since we're building locally, create a new file named config.development.json, then copy and paste the following:
{
    "url": "http://localhost:2368",
    "server": {
      "port": 2368,
      "host": "::"
    },
    "database": {
      "client": "mysql",
      "connection": {
        "host": "",
        "port": 3306,
        "user": "",
        "password": "",
        "database": "",
        "ssl": {
          "ca": ""
        }
      }
    },
    "storage": {
      "active": "ghost-azure-storage",
      "ghost-azure-storage": {
        "connectionString": "",
        "container": "",
        "cdnUrl": "",
        "useHttps": "true"
      }
    },
    "logging": {
      "transports": ["file", "stdout"]
    },
    "paths": {
      "contentPath": "/var/lib/ghost/content"
    }
  }
Once you copy this into your local repository, you will need to populate this storage and database connection information from Azure. The quickest way to obtain this is to navigate to the Azure Portal, and browse to each resource to find your connection strings, hostnames, and Azure's public SSL key, which is needed for the "ca" value. The "cdnURL" value is the address to your Content Delivery Network, usually in the format "cdn.yourdomain.com". You'll need to CNAME record with your chosen domain registrar.
Building your Dockerfile
To assemble your Ghost image, you will need to build a Dockerfile. A Dockerfile is used to outline the commands needed to create your container. In your favorite code editor, create a new file called Dockerfile and paste the following code into the file:
# This line defines your base image using the official Docker Ghost Alpine image.
# https://hub.docker.com/_/ghost
FROM ghost:5.105.0-alpine
# This line sets the working directory
WORKDIR /var/lib/ghost
# This line copies your local settings to config.production.json on the image
COPY config.development.json config.production.json
# This line copies your content over
COPY content content
# These lines install the custom storage adapter - https://github.com/hvetter-de/ghost-azurestorage
RUN npm install ghost-azure-storage
RUN mkdir -p /var/lib/ghost/content/adapters/storage
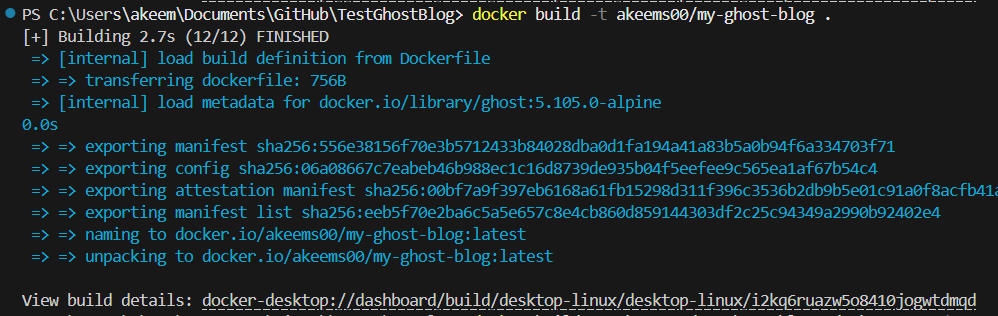
RUN cp -vR node_modules/ghost-azure-storage /var/lib/ghost/content/adapters/storage/ghost-azure-storageAfter you paste and save the file, in your CLI run the following command to build your Ghost image:
docker build -t dockerusername/my-ghost-blog .If successful, you should receive an output similar to the one below:
To test your Ghost image, you can use the "docker push" command but I decided to flip over to the Docker Desktop app, run the image, and view the logs during container creation. Make sure to set the localhost port to 3001.
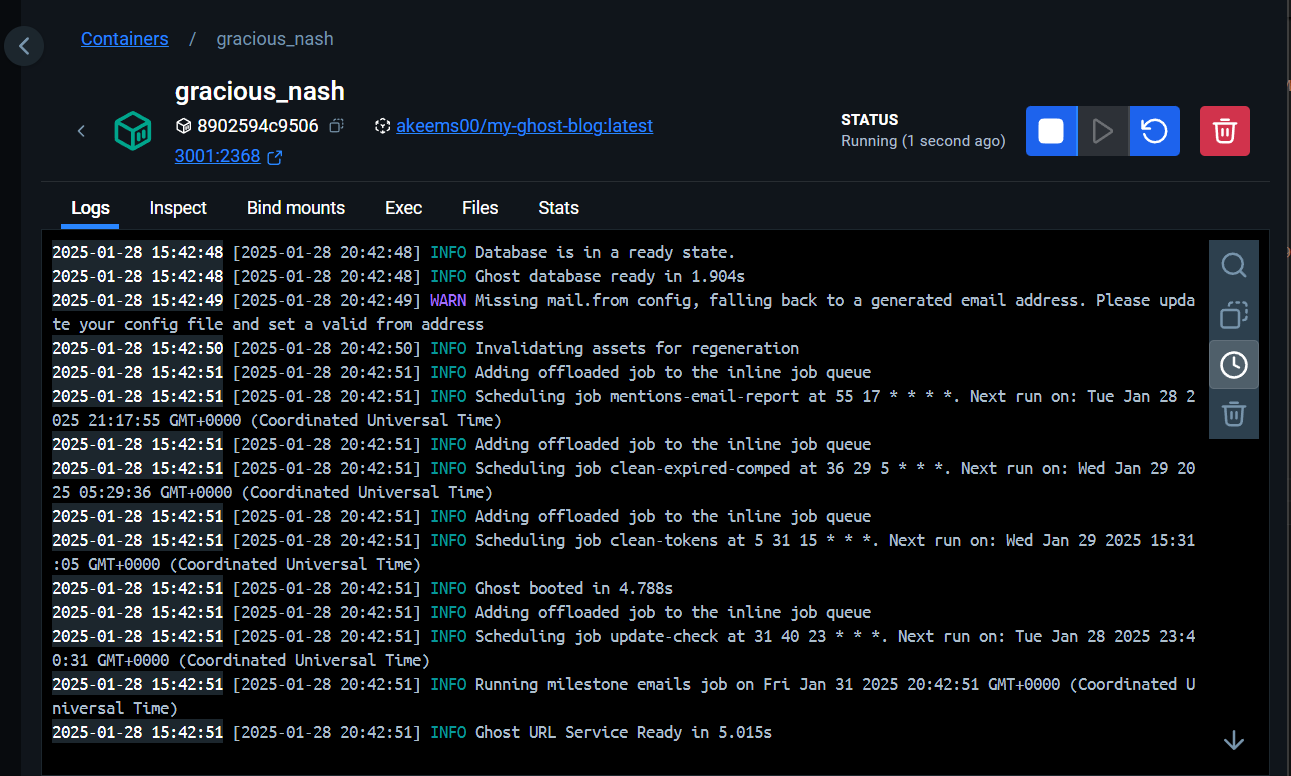
Click on the localhost link and you should see the sample page for your Ghost blog!

Now that we know our Ghost Docker image is working, let's stop our local container and we can now begin to push it to the Docker Hub. You can either run the "docker push" command or push from the Docker Desktop app. Flip over to the Hub repositories tab and you should see your newly created image.

Click the "View in Hub" button and log in with your credentials. Under your Ghost image repository settings, please make sure to set the visibility settings to private. This will ensure that anyone who doesn't have the appropriate access token will not be able to perform a pull. Next, navigate to your Docker account settings go to personal access token, and then generate a token with read/write permissions. Hang on to this key as you will need it to create the last Azure resource, our Azure Web App for Linux.
Deploying your Azure Web App
We're in the home stretch, we just need to deploy and build our Azure Web App. We will run the following line of code to begin the deployment:
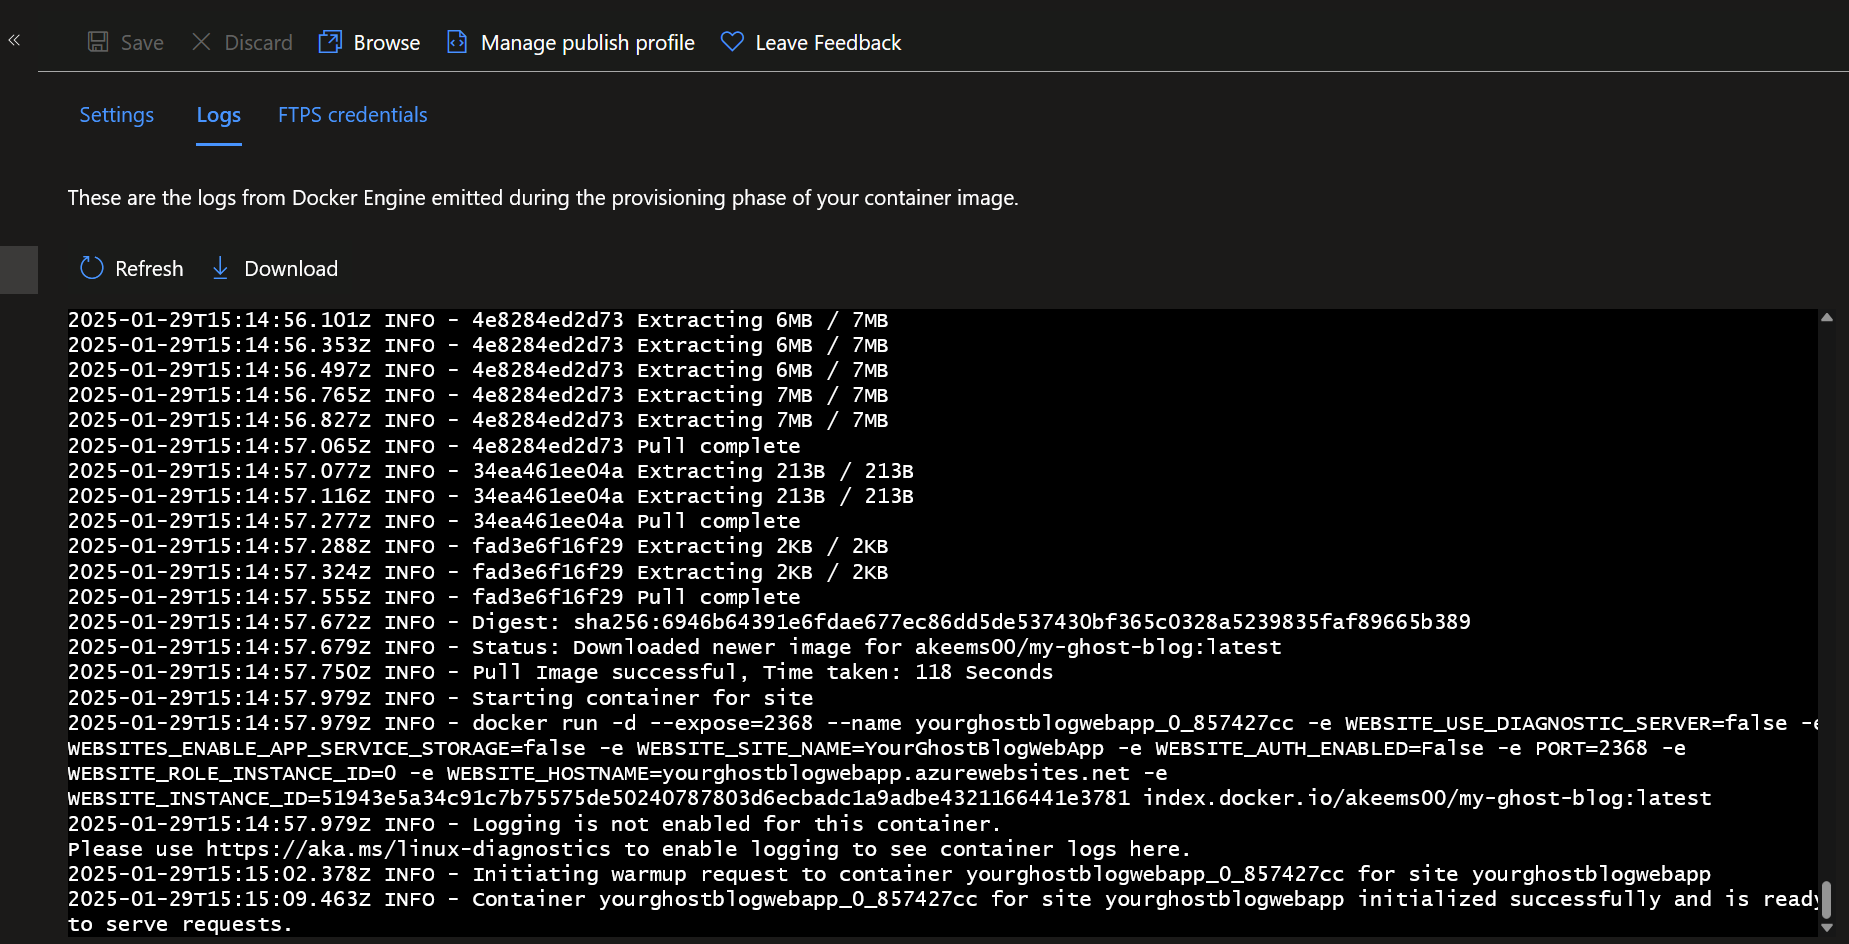
az webapp create --name "YourGhostBlogWebApp" --resource-group "YourGhostBlogNameHere-RG" --location eastus2 --plan "YourGhostBlog-ASP" --container-image-name "https://index.docker.io/your-docker-username-here/your-ghost-image-here:latest" --container-registry-user "docker-username-here" --container-registry-password "docker-access-token-here"When you run this, the Azure CLI will redact some sensitive info and suggest you to "az webapp config appsettings list" or go to the Azure Portal to view them, but the code will execute successfully. Next, let's go browse to the web app in the in Azure Portal, and you should see that it's in its starting/provisioning phase. This phase may take a few minutes but you can view logs to monitor the process by navigating to Deployment Center > Logs.
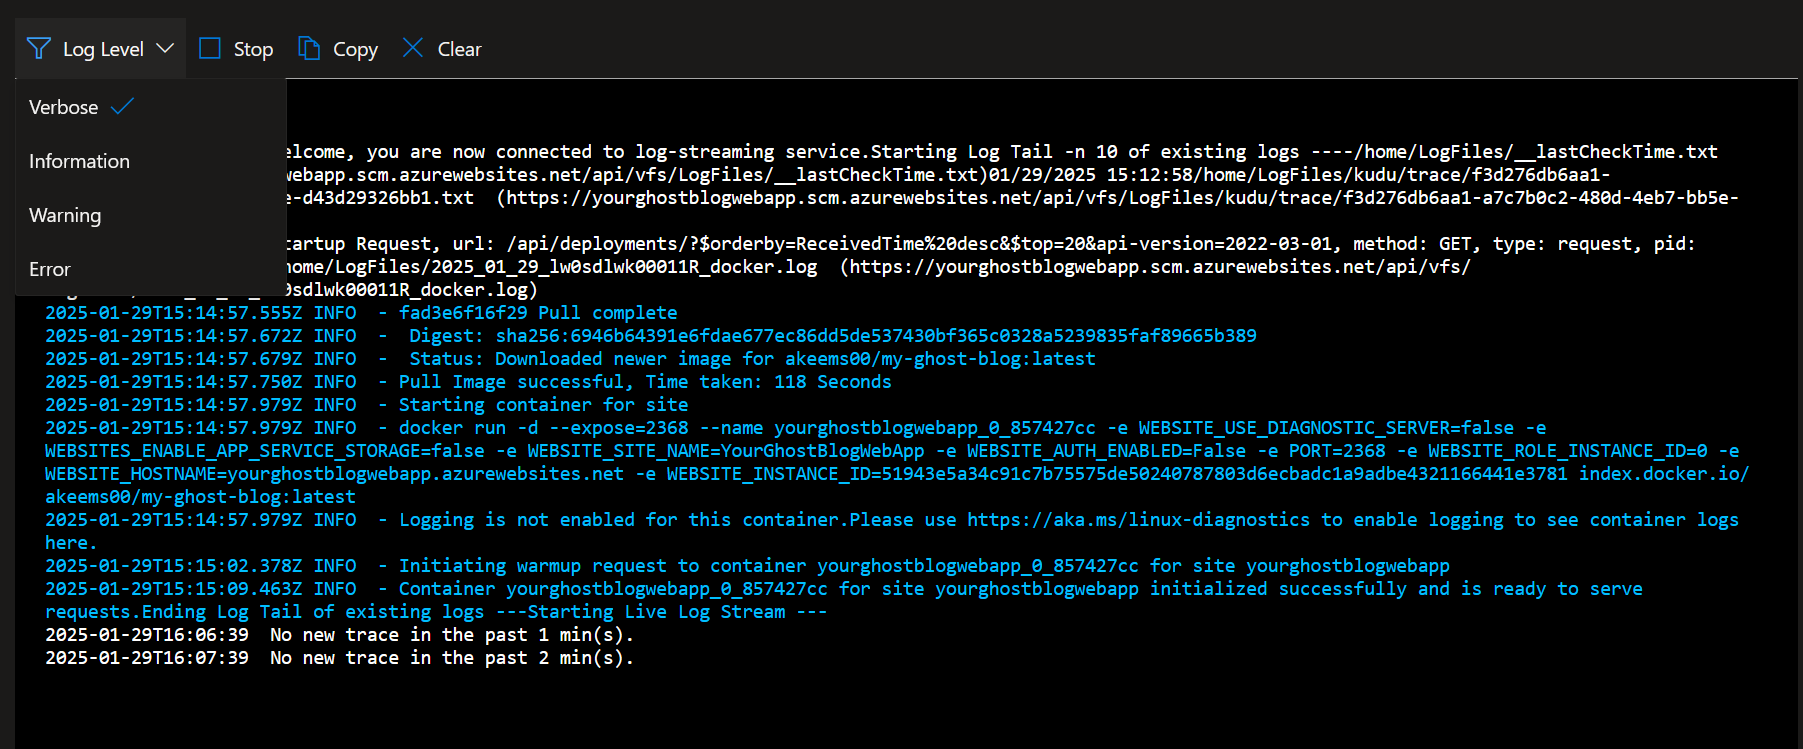
For more verbose logging, you can navigate to Monitoring > Log Stream and view everything output by your web app. You can also filter by information, warnings or errors using the Log Level filter.
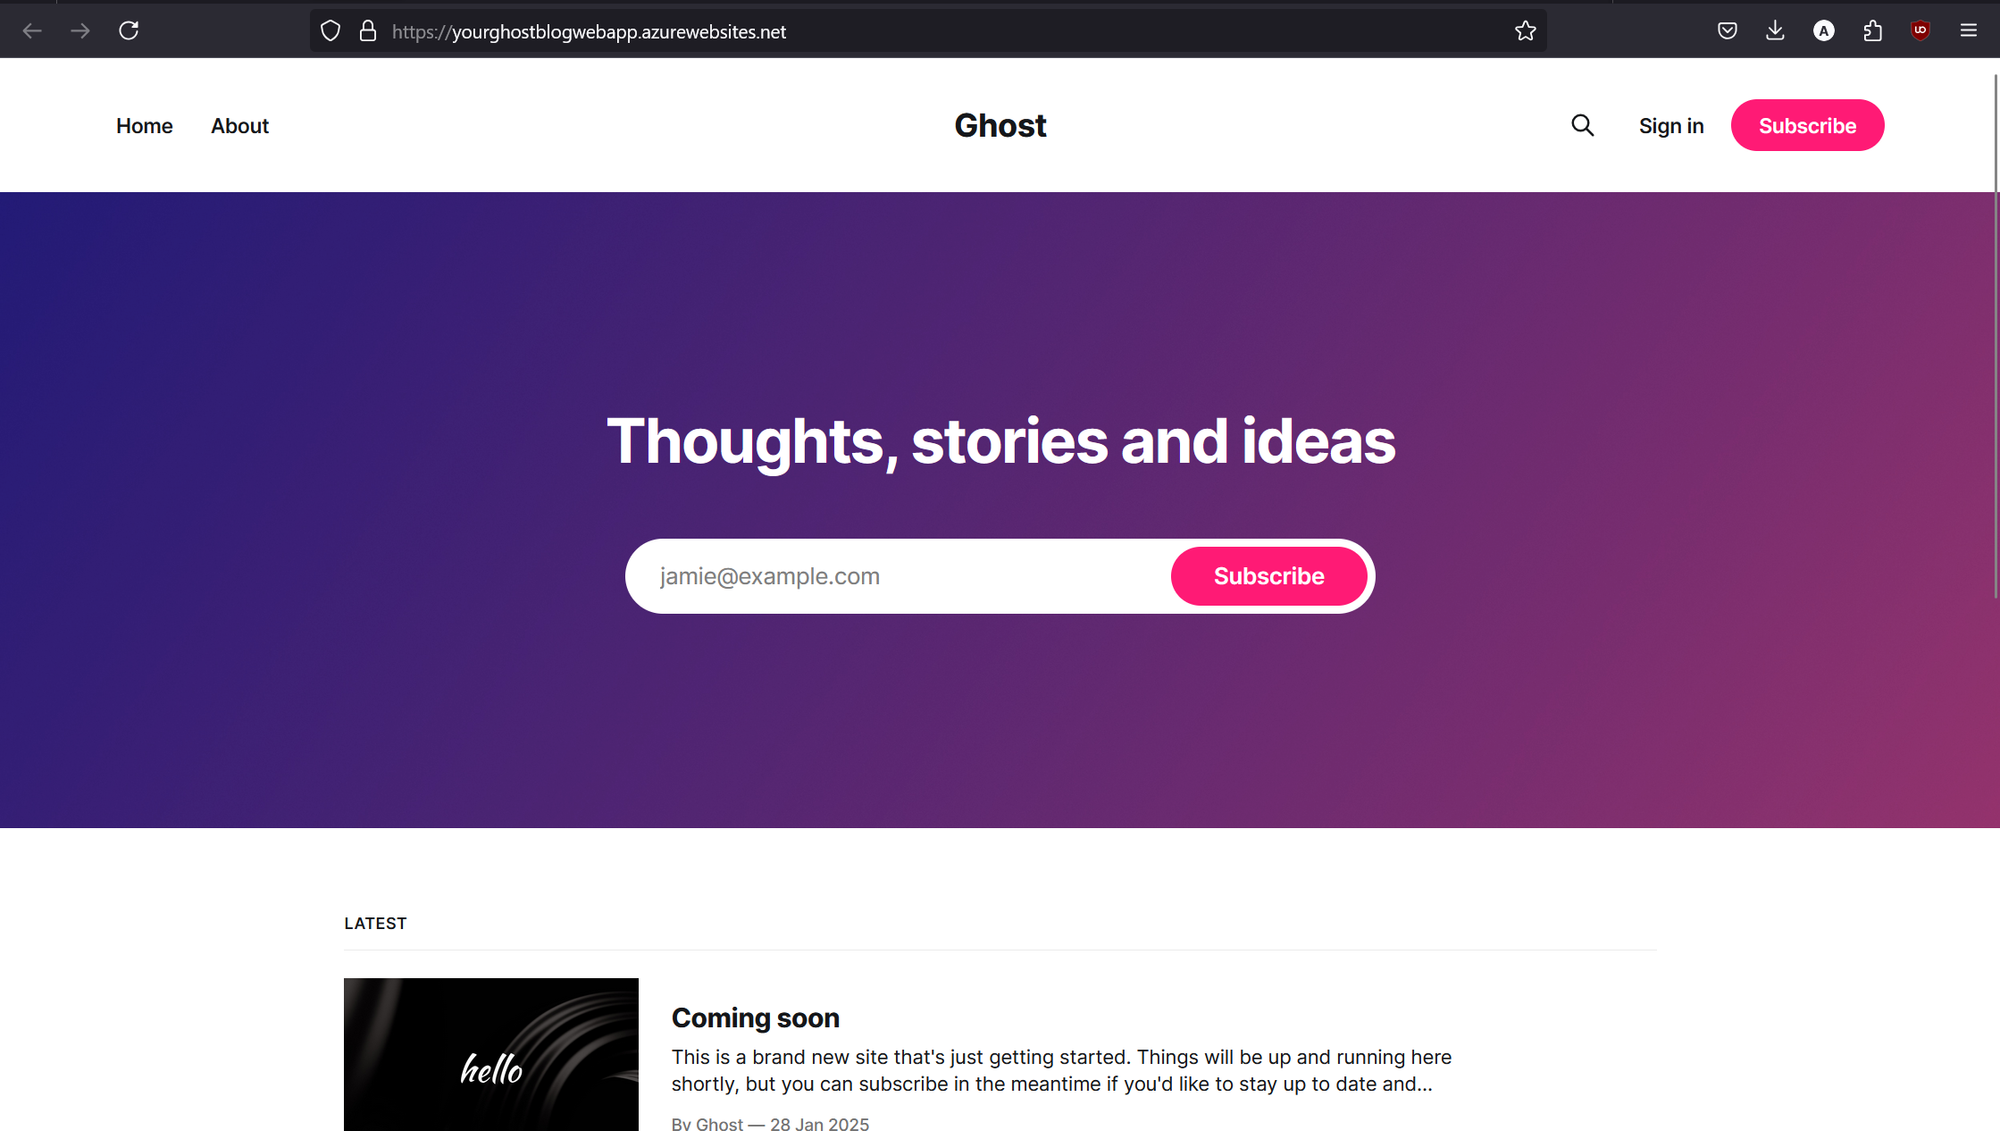
Now head back to the overview page for your web app and you should see a link to your blog with the default "https://WebAppName.azurewebsites.net/". Click on that link and you should be brought to the sample page for your Ghost blog.
We're now done with most of the heavy lifting, all that's left is to tie everything together with your chosen domain registrar. Before we move on though, I suggest that you sync your local resposity with a cloud-based one such as GitHub. Then make sure that your cloud repository is private so no one but you can view or pull your code.
Setting up your Custom Domain and Content Delivery Network (CDN)
Adding a Custom Domain to your Web App
Back in the Azure Portal, navigate your Azure Web App and on the Overview page click on the Add Custom Domain link, then click on the Add custom domain button. This should bring up a Add custom domain panel on the right-hand side of the Portal window. On domain provider, select All other domains and in the domain field add your chosen domain name beginning with a DNS prefix of "www." or whichever prefix you'd like. When entered correctly, Azure should produce CNAME and TXT records for you to validate with your chosen domain provider.
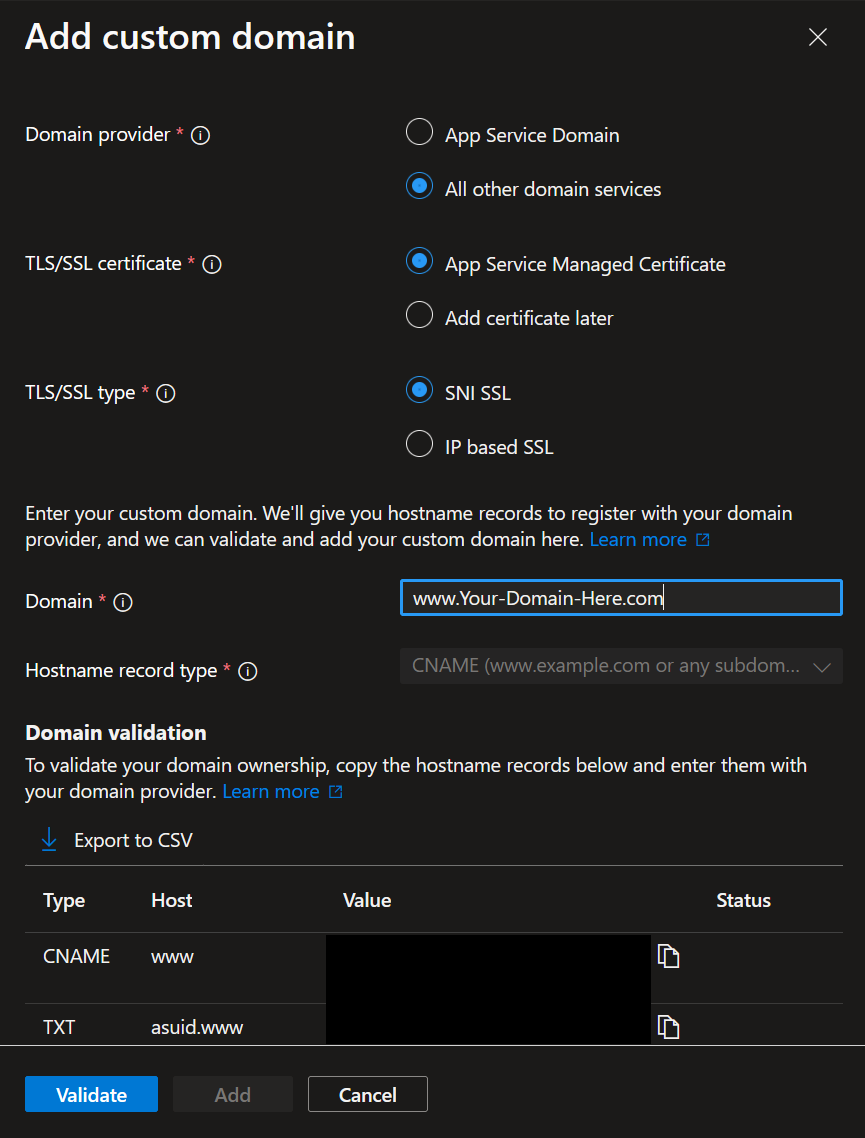
Head over to your domain provider and create CNAME and TXT records, paste the corresponding values and save them. Then head back over to your Azure Web App and hit the Validate button. Once the status updates to Validated, you will be able to add your custom domain. Next, navigate to Settings > Environment Variables > App Settings within your Web App. Then, hit the add button name your new setting url and the value should be your custom domain. Hit apply, the open a new browser tab and navigate to your custom domain. It should now resolve to your Ghost blog!
Adding a Content Delivery Network to your Azure Storage Account
Now, head over to your Azure Storage Account, navigate to Security + Network > Networking and then click on the Custom Domain tab. Enter your domain name with the DNS prefix "cdn." or whichever prefix you prefer and hit save.
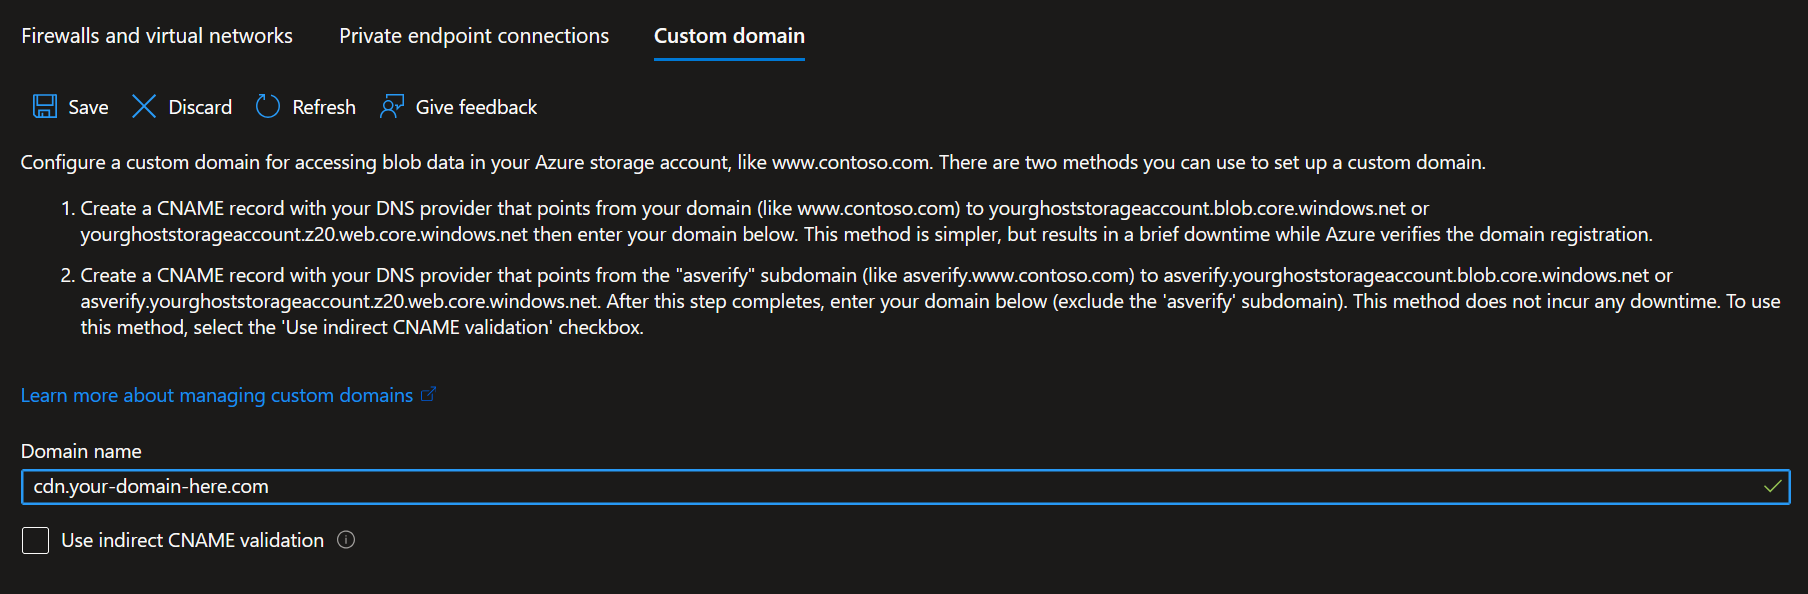
Then, head back to your domain provider, create a new CNAME record, and add the web address to your storage account as outlined in option 1 in the screenshot above. Once everything is saved and validated, your Azure Storage Account is now configured to use your domain provider's CDN! Now, all that's left is to log into the Ghost Admin portal.
Ghost Admin Portal and Optional Integrations
To access the Ghost Admin portal for your blog, you'll need to navigate to yourdomainhere.com/ghost. Once you're there, you'll be prompted to create an account. I suggest setting a complex password and using a password manager to store it securely. Congrats, you've successfully launched your blog using Microsoft Azure and Ghost!

Once your account is setup, I suggest looking into different integrations and add-ons for your Ghost blog. I ended up using the following:
- Google Docs - Draft your posts in Docs (or Word) and send them to Ghost
- Ghost Bookmarker - Bookmark links and send them to Ghost
- PrismJS - Code syntax highlighting for websites
You can also configure your Ghost blog for email newsletters using Mailgun. Mailgun's free plan allows you send 3,000 emails a month. If you want to use this service, you will need to set it up in the Ghost Admin portal and also remember to add the Mailgun API information in the "mail" section of your config.development.json file. Once updated, remember to rebuild your Docker image in locally your CLI, push it the Docker Hub and then restart your Azure Web App so your container can update with the changes. Mailgun will also walk you through adding DNS records to your domain provider as these will be needed to route email to intended recipients.
Final Thoughts and Next Steps
This project took me a few weeks to put together. I built this out a few times just to ensure everything was working as intended before publishing this post. My original plan was to use Azure for everything, including the custom domain, CDN, Container Instances, and Container Registry for the Docker container. However, during my research and testing, I found that consolidating all of your services in Azure works very well but your monthly cost increases, especially so for Azure CDN and Custom Domain.
While I move to cover other projects and topics, I want to continue improving this blog. I'd like to create a backup process for the blog's data and settings just in case something happens. I'd also like to utilize Terraform to streamline the creation and management of the blog resources. Terraform is a cross-platform infrastructure-as-code tool use to create, manage, and update cloud infrastructure. Terraform can interface with all of the services we used to create this blog like Azure, Docker and Cloudflare (plus much more). More on this soon!
Please subscribe and follow me on LinkedIn for more updates!
Resources